
Deployment and hosting
Netlify
You can host this website anywhere static websites are supported. Some options are https://www.netlify.com as the deployments are just dead simple.
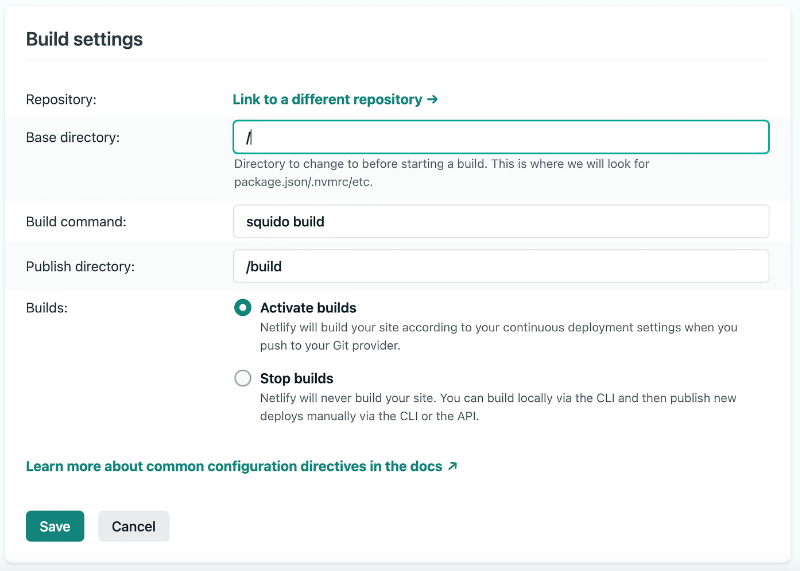
Simply connect your Git repo and set the Build settings settings like below:
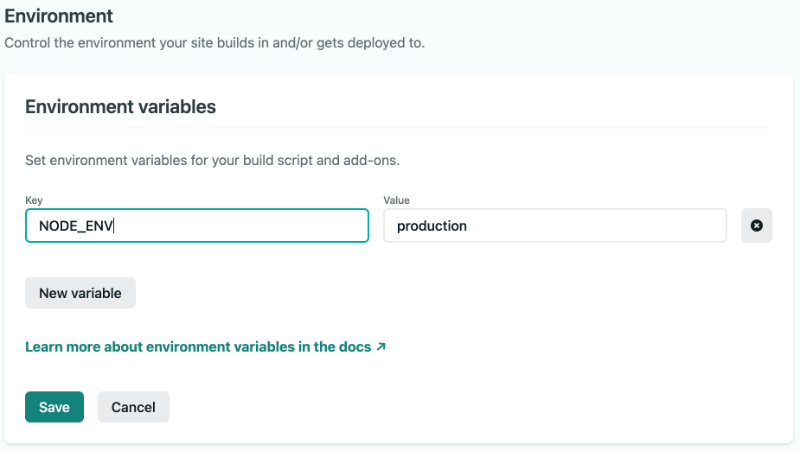
And set the Environment variable to align with your config.js file:
You are done. Now each push to your Git repo will trigger the build and deploy on Netlify.
Github pages
Publishing to Github pages is easy. Simply set your config buildDir to docs and the correct baseUrl. Eg:
production: {
    name: 'squido',
    description: 'This is the blog description',
    twitterHandle: '@mrvautin',
    baseUrl: 'https://<github-username>.github.io',
    sourcesExt: 'markdown',
    sourceDir: 'source',
    buildDir: 'docs',
    summaryLength: 250,
    port: 4965,
    pagination: true,
    postPerPage: 8
}
Then simply build your website with squido build -c and push to your Github repo.
You then need to set Source to /docs as shown here and may need to change the branch.
You can then either access at your Repo URL (https://<github-username>.github.io) or a custom domain
Amazon AWS Amplify
It's very easy to publish your squido website to AWS Amplify.
- Login here
- Select
New App - Select
Host web app - Select the Git repository and authenticate. Eg: Github
- Select the Repository name and branch from the populated list(s)
- Click
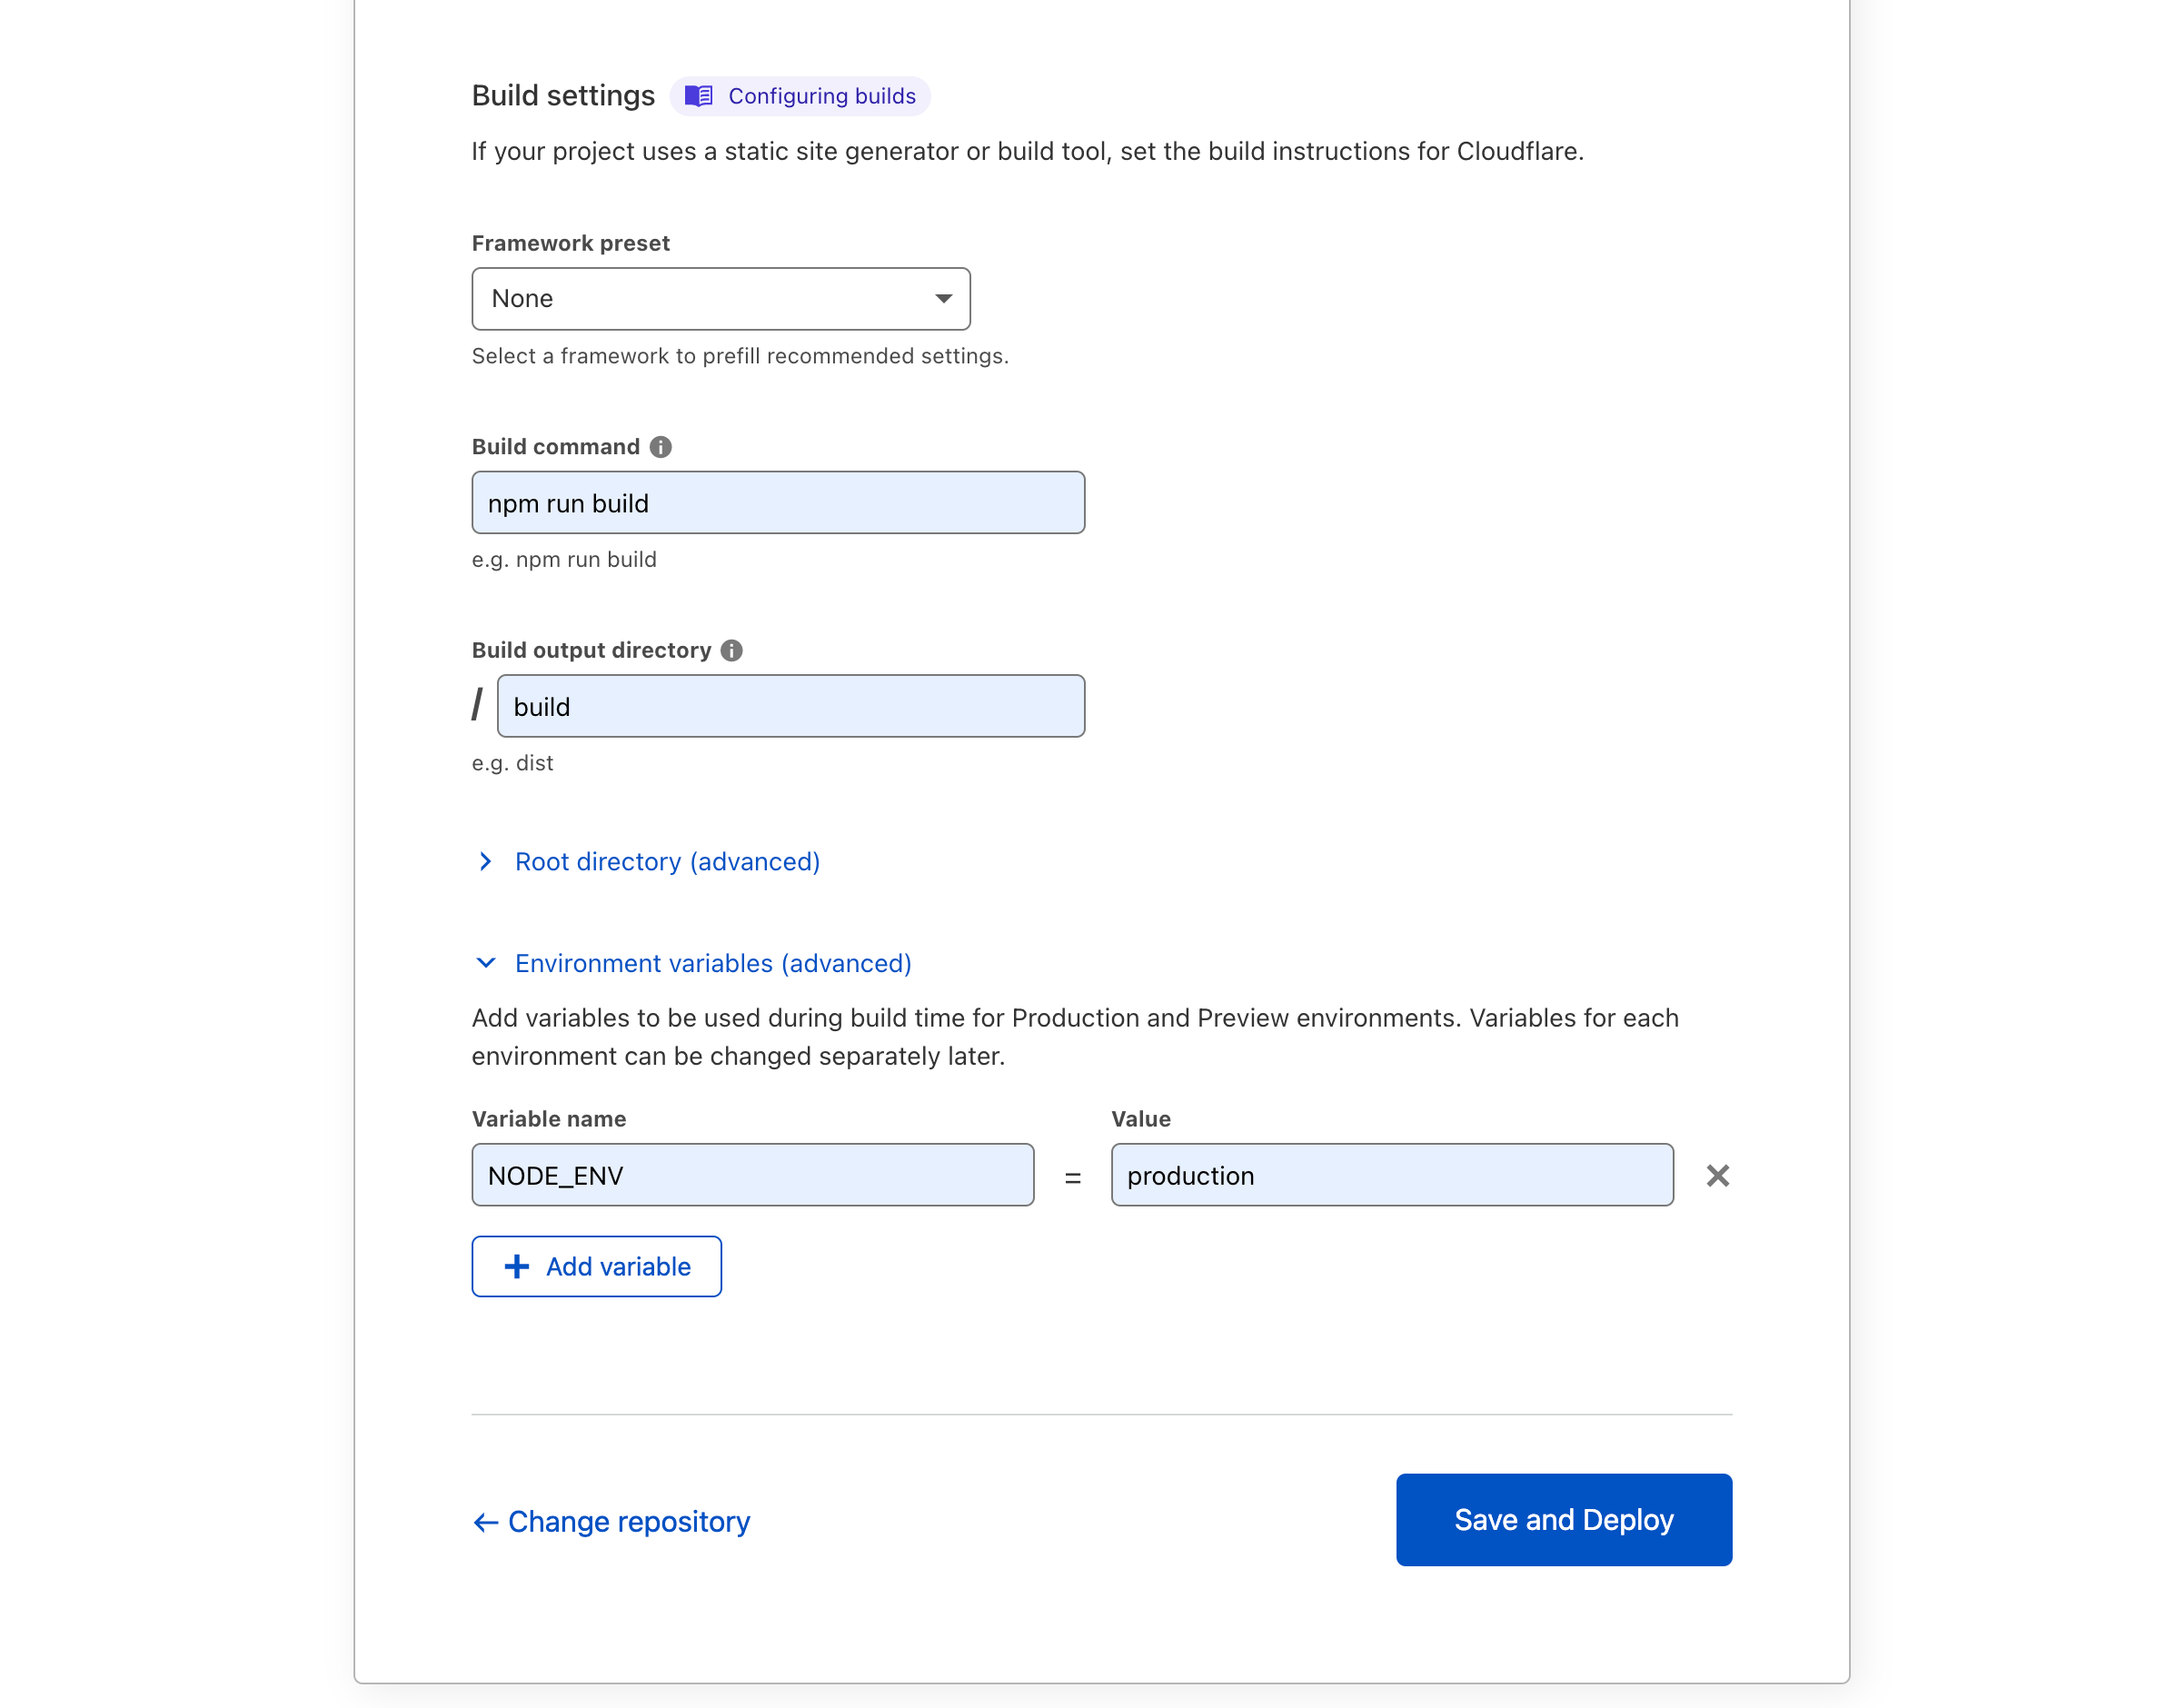
Editon the build commands and ensurebaseDirectoryis set to/build. Eg Yaml file will look like:
version: 1
frontend:
  phases:
    preBuild:
      commands:
        - npm ci
    build:
      commands:
        - npm run build
  artifacts:
    baseDirectory: /build
    files:
      - '**/*'
  cache:
    paths:
      - node_modules/**/*
- Click
Save and deployand wait for your website to be built!
Cloudflare Pages
It's very easy to publish your squido website for FREE using Cloudflare pages. Free SSL, custom domain, global CDN and more and just super simple to setup.
- Login here
- Select
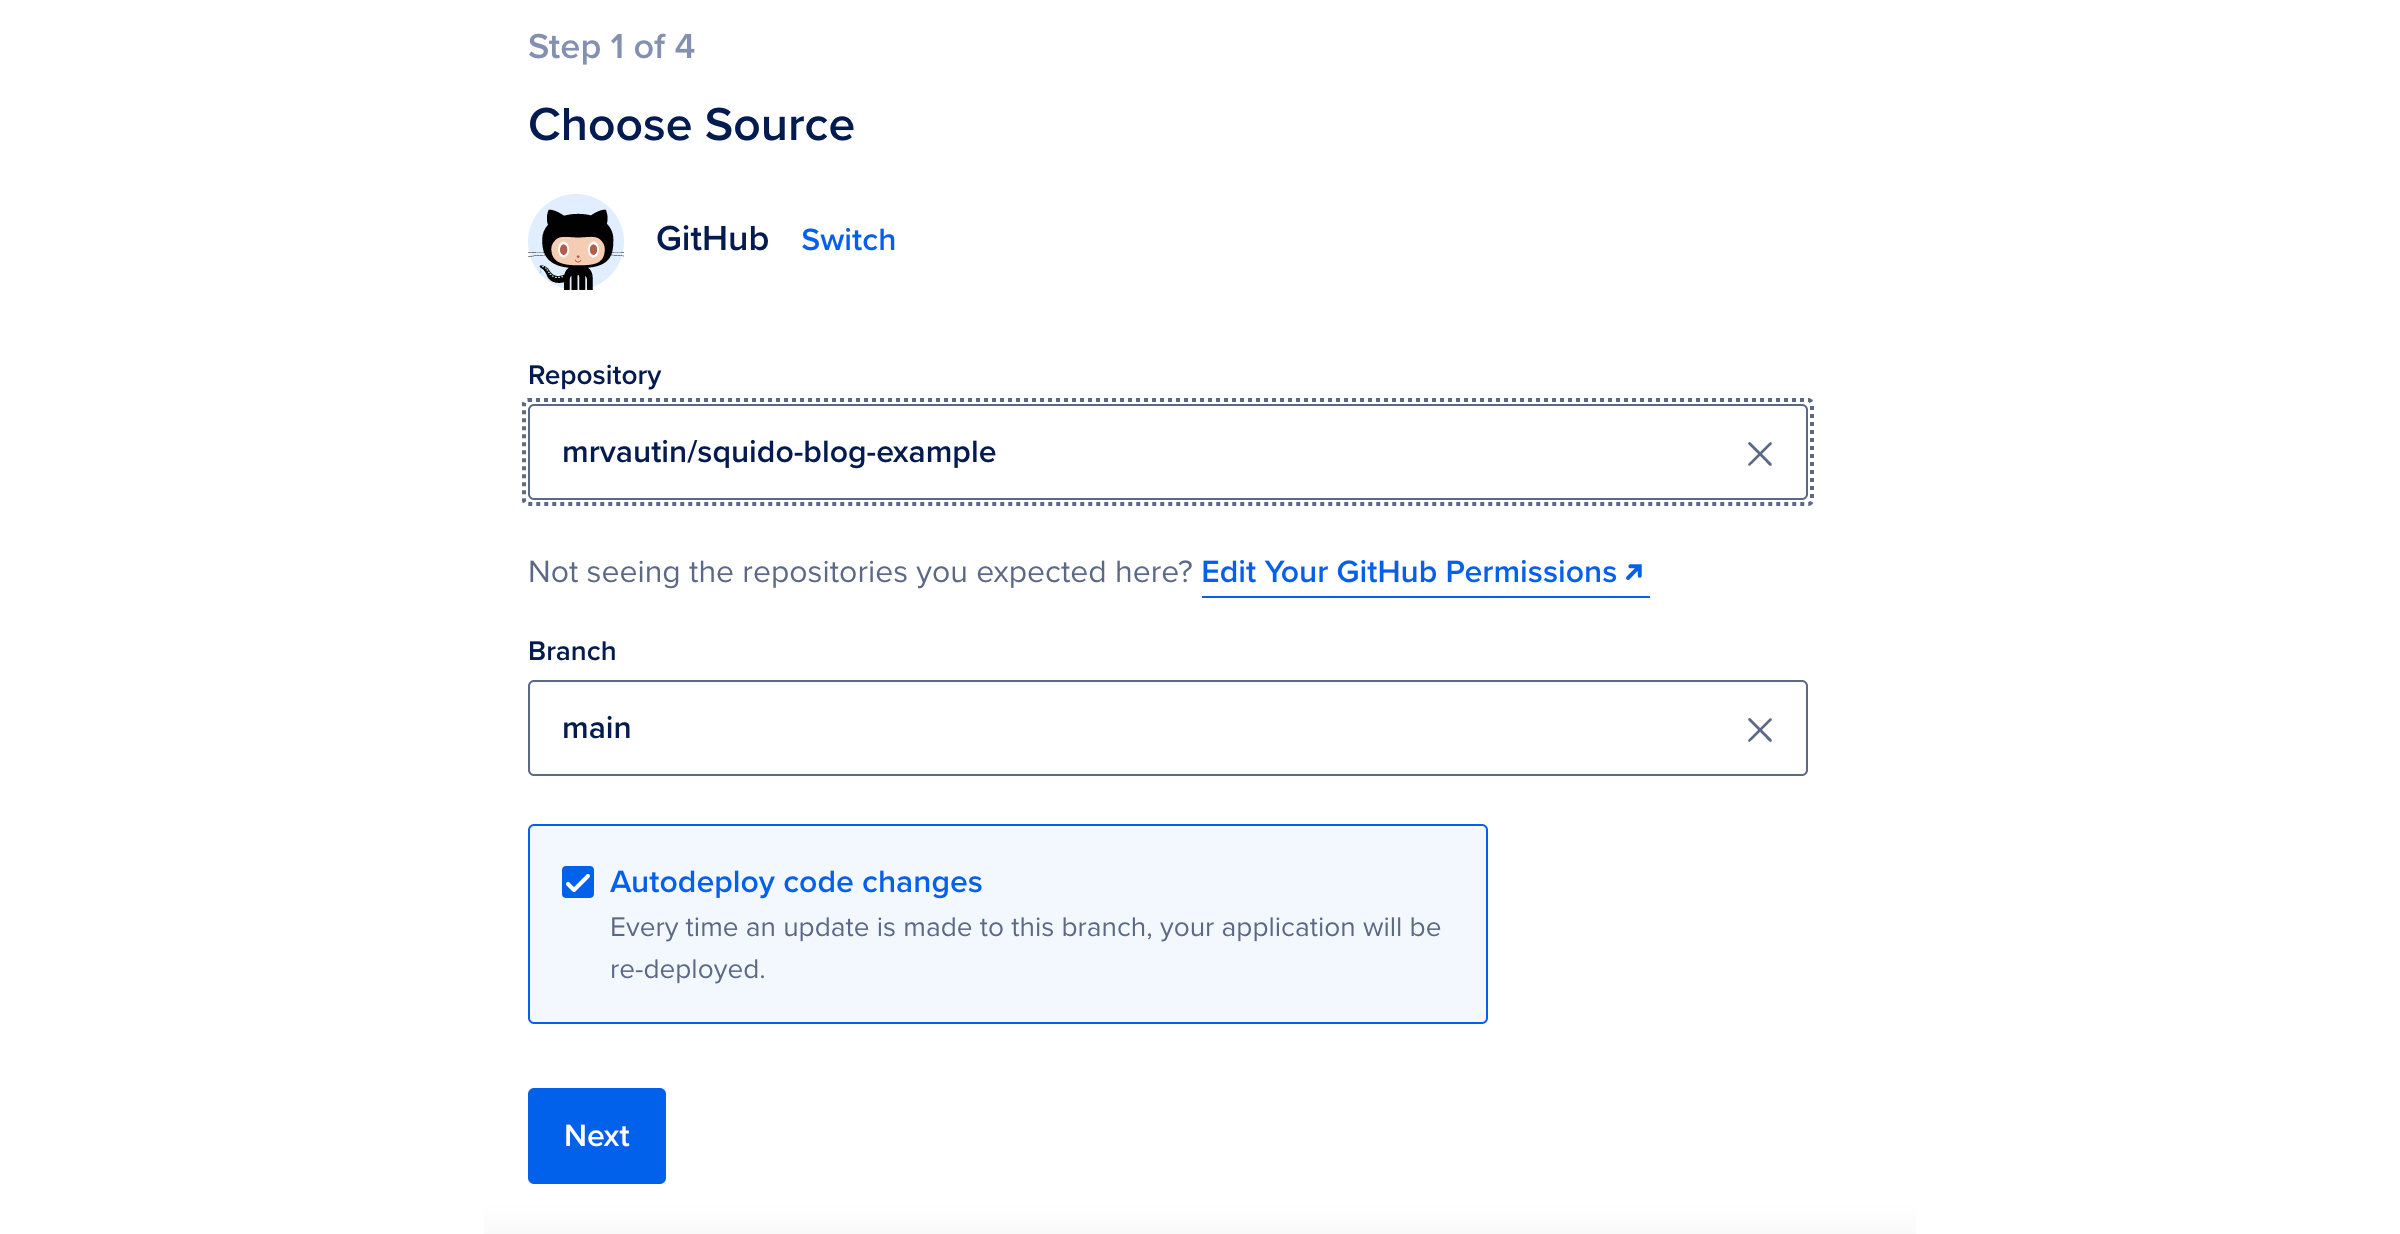
Create new project - Link your Github account and select your repository, then
Begin setup - Setup like:
- Click
Save and deploy - Wait for the build to complete
- You can then setup
Custom domainsand you are done
Digitalocean Apps
Digitalocean Apps makes hosting your static HTML squido website for FREE just so bloody easy. Digitalocean Apps offers free SSL, custom domain, global CDN and more.
- Login here
- Select
Githubas source and choose yoursquidoRepository:
- Hit
Next - Setup like:

- Hit
Next. - Name your app then hit
Nextonce more - Select the plan. Choose
StarterforFREEhosting - Hit
Launch Starter App - Wait for your app to build. Watch the logs by clicking the
View logsbutton - Once your build is complete you can select
Settingsand configure your domain and more
You are done. Enjoy your super fast hosting on the awesome Digitalocean platform!
Azure Static Web Apps
Publishing your squido website to Azure Static Web Apps is very easy and low cost.
- Visit https://portal.azure.com, login and create a free Static Web App.
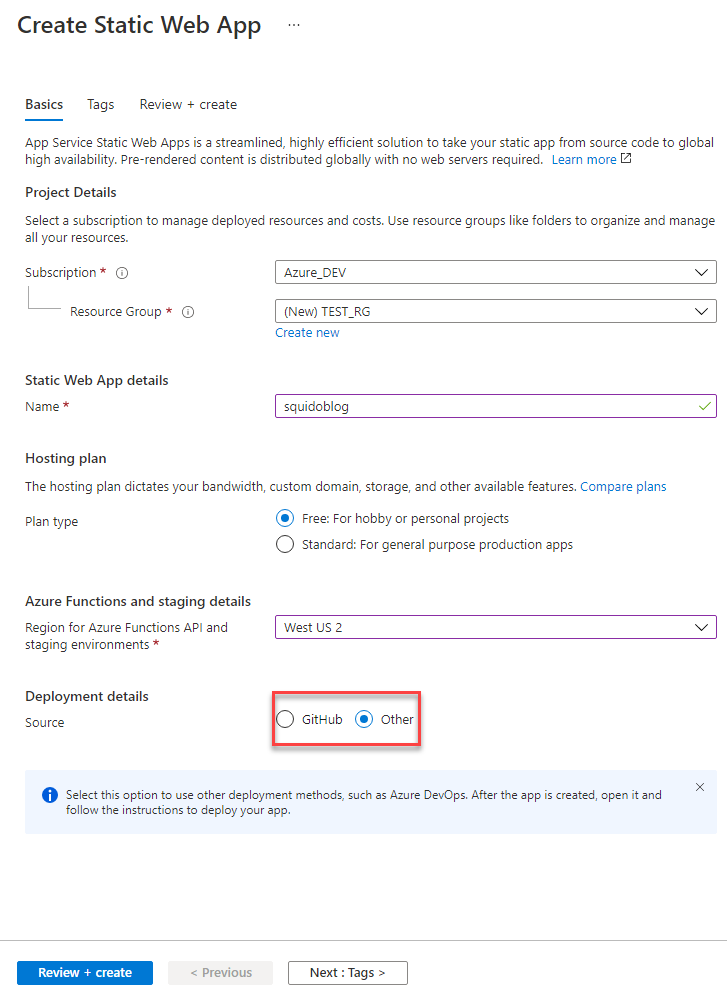
- To use Azure DevOps instead of a Github repo, select
OtherunderDeployment details. - Once the resource is provisioned, from the Static Web App Overview page, click
Manage Deployment Token. Copy this token somewhere safe. It will be used later.
- Visit https://devops.azure.com, login and create a New Project
- Click
Reposand clone the Azure repo to your local machine. Either move your existingsquidosite into this local repo, or create a newsquidosite. Commit and push code to this Azure DevOps repo - Click
Pipelinesand create a new Pipeline for the project. SelectStarter Pipelineand paste in the yaml template below
trigger:
  - main
pool:
  vmImage: ubuntu-latest
variables:
- name: NODE_ENV
  value: production
steps:
  - checkout: self
    submodules: true
  - task: AzureStaticWebApp@0
    inputs:
      app_location: '/'
      output_location: '/build'
      azure_static_web_apps_api_token: $(deployment_token)
- Click
VariablesthenNew Variable - Name the variable
deployment_tokenand paste in theDeployment Tokenfrom Step 1c. above - Save and run the Pipeline
- Visit the URL shown in Static Web Apps in Azure Portal